Carving a masterpiece starts from your preparation of the wood. There is little to no preparation if you’ve bought wood from the store. However, with freshly cut wood, or green wood as we call it, there are some steps you can follow before carving it. In this post, I share some steps to follow when preparing wood to carve for beginners.
How to Prepare Wood for Carving
1. Remove Away the Bark if Possible
The first step of preparing wood for carving is deciding whether to remove the bark or keep it. This decision is based on the type of wood carving project you have in mind. If the bark is part of the project, then it is better to keep it. However, if it has no use, it is best to peel it off.
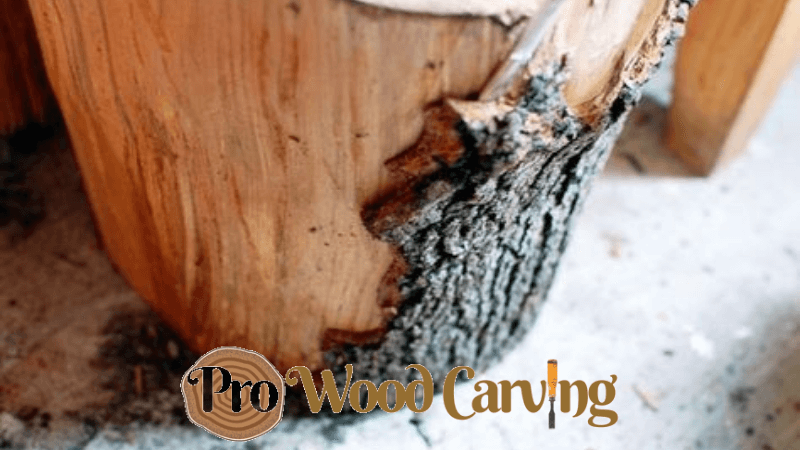
Some trees also have their bark tight to the wood, which is harder to remove. However, others have bark that falls off by itself allowing moisture to escape. For example, removing a Mesquite bark is fairly easy when dry, but very hard when fresh. For willow, that is the opposite. The bark peels off when wet, but forget it when dry.
There are several methods of removing a wood’s bark. Using a pressure washer, sandblasting, use a dull chisel, and many others.
2. Cut the Wood into Different Sizes
After removing the bark, it’s time to cut the wood into different sizes. If you are looking to carve small items like chess pieces, figurines, gnomes, you should cut them up into smaller sizes. For larger items, just follow the dimensions and cut the pieces accordingly.
3. Treat the Wood to Minimize Cracking
Greenwood is very prone to cracking or splitting when drying up. Cracking is caused by several reasons including high moisture content, low moisture content, and expansions and contractions. Newly cut wood cracks due to high moisture, while dryer wood cracks because of contractions due to low moisture.

To keep wood from splitting or cracking, you need to decrease the rate of wood drying. There are several methods you can use to minimize splitting. You can apply a sealant or stabilizer, apply salt paste, melted paraffin, use varnish, apply paintable wax, use boiled linseed oil, or use anchorseal, among many other methods.
Anchoseal is a commercial sealant and one of the best used on greenwood to prevent cracking and splitting. Anchorseal is applied on the ends of freshly cut logs. If you haven’t yet split your logs, applying anchorseal on the ends will help in minimizing cracking as the wood dries. Check out the Anchorseal 2 that I have worked with before and does the job best.
Pentacryl is another commercial sealant used by woodturners and woodcarvers to keep greenwood from cracking, splitting, or checking during the drying process. When wood is in its green state, brush on repeated coats of pentacryl until the wood does not absorb any more. For smaller pieces of wood that are to be carved, soak them in pentacryl for 24 hours for each inch of thickness.
Read more on how to keep wood carvings from splitting, will linseed oil stop wood from cracking? and why does your wood keep splitting?
4. Dry the Wood
If you prefer to carve dry wood as opposed to greenwood, then it’s time to dry the wood. Drying wood depends on different environmental conditions such as humidity level, sunlight exposure, and temperature just to mention a few. On average, it takes about 6-10 weeks to dry wood before it can be used for carving. This is the duration when done in perfect conditions.
When drying wood, keep it in a sheltered place out of the rain. Avoid drying out in winter because if temperatures drop below freezing, moisture in the wood will still be frozen. Insulate the wood during winter in your basement or garage for about 55 to 65 degrees F.
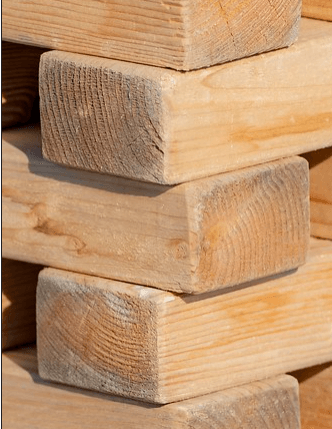
Avoid stacking the wood tightly together to allow airflow between the pieces. You can alternate the wood or separate the chunks with bricks.
5. Store the Wood for Use
Once you have dried, you should take extra steps to make sure your wood remains in good condition before carving. This is to prevent the wood from warping, or insects and bugs from destroying the wood.
First, find clean dry storage, which will prevent moisture from warping your wood. Store the wood by stacking as earlier pointed out or use bricks to separate them. If you live in a humid area, you can cover the wood with a material that prevents vapor accumulation.
You can also monitor the humidity of the storage area to ensure the humidity is always at an optimum level. A dehumidifier with an automatic humidity sensor like the Ivation IVADM45 can help keep the humidity in check. The use of prong meters can also help measure the moisture content in the wood, which can help you better store the wood.
Carving Green-Wood or Dry Wood
Most wood is best carved dry. This is because the likelihood of dry wood cracking or splitting is much lower due to moisture lost when drying. However, greenwood is also a popular option because it is easier to carve with. It is soft making cuts easier and smoother.
See our in-depth article on greenwood vs. dry wood for carving. Also, check out this guide on how to soften wood for carving.
