A spoon is an ordinary tool that is part of our everyday lives. From stirring our first cup of coffee in the morning to scrapping the last bits of food in the evening, it has become entwined in eating and socializing. Wooden spoons have been around for a while, and they are easy to make, even for beginners.
This post will provide you with the ground information needed for spoon carving. Here you’ll find useful information on buying the right tools, choosing the right type of wood, creating your first spoon blank, and how to carve your first spoon from wood. Enjoy.
Spoon Carving Tools
Having the right tools for spoon carving is essential. You can have a small number of tools to be able to start spoon carving. The three essential tools you’ll need for spoon carving are an axe for chopping and splitting, a straight knife for shaping the spoon, and a bent/hook knife for hollowing it out. As you advance in this craft, you’ll work with different tools or stick to a knife or two to create the perfect spoon.
The Axe
The axe is useful for roughing out wood to create a spoon blank for a spoon carver. An axe is a versatile tool that will allow you to work just about anywhere. The normal axe you can buy from your local hardware is designed to split wood, not carve. Most axes for splitting wood have a round edge and convex bevel rather than a flat bevel. The bevel is the part that makes up the cutting edge of an axe.
A wood carving or spoon carving axe should have a flat bevel that is sharp enough to rough out wood easily. A wood carving axe should also be lighter. Currently, the Gransfors Bruks Wildlife Hatchet is our best spoon-carving axe. Check out our post on the best axes for spoon carving and other options available.
The Straight Knife
The straight knife used in carving is different from your normal kitchen knife. The bevel of a wood carving straight knife is flat and should be wide enough for a flat planing cut, which is usually used for carving out the handle of our spoons. The tip should also be short enough to make tight, concave cuts at the neck. The straight knife should also have a symmetrical handle, so you can hold it in different ways.

Straight Knife for Spoon Carving
For wood carving knives, a good brand to check out is Mora. Morakniv knives are great and have been a go-to tool for craftsmen. The craftsmanship that goes into producing each knife is evident as soon as you start using it. The knives are also mass produced which makes them very budget-friendly.
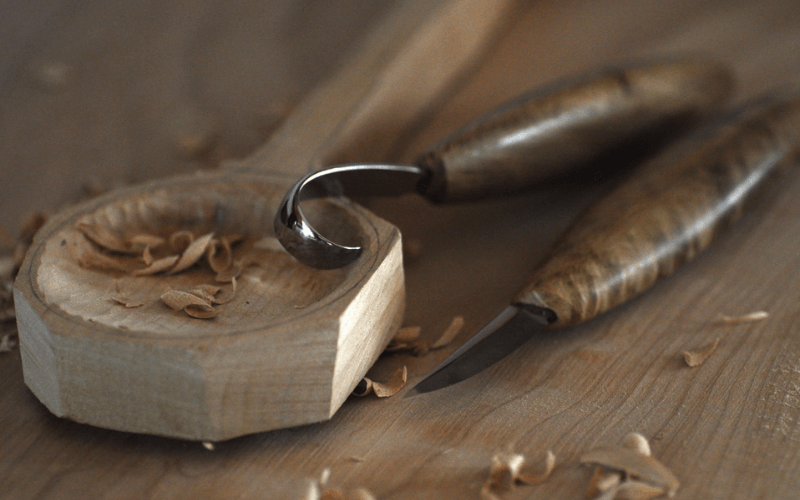
The Hook/Bent Knife
The hook knife also called a bent knife or spoon knife, is the knife you’ll use to carve the bowl of the spoon. Like a straight knife, the hook knife cuts across the fibers of the wood, but in a round/convex shape. The hook knife is usually double-edged, and you can use the different sections of the blade to make deep, hollowing cuts by guiding it.

Hook Knife For Spoon Carving
With a hook knife, you can create different types of spoons, It is an extremely versatile tool, which even a beginner can learn to use easily. Like a straight knife, I recommend checking out Mora knives for a good hook knife for spoon carving. For a good option, check out the Mora 162 Hook Knife.
Other Spoon Carving Tools
Other spoon-carving tools can make it easier and faster to carve. Below are some spoon-carving tools you can add to your collection as you advance in this craft.
- The Mallet – This is a great tool for controlled splitting, like driving a wedge or axe into the wood. A mallet can be made out of a lump of wood with reasonable tensile strength. The length of the Mallet should be easy to swing and heavy enough to give enough force and momentum. It should also be comfortable for you to grasp and use.
- The Saw – A saw is a relatively modern tool compared to an axe, knife, or hook knife. In spoon carving, a saw is great for cutting across the grain, which can be hard when using an axe. If you have a normal saw, you can use it efficiently to saw through logs in the early process of spoon-making. A folding saw, which is small and portable, is also great to have as a spoon carver.
- Adze – An adze is an efficient tool that uses its weight and momentum to chop and slice wood. The blade of an adze is curved like a gouge or hook knife, which helps you hollow out your spoons or bowls more quicker. Although it is a good tool to have in the future, it is not versatile as an axe and would be unnecessary for a beginner.
- The Drawknife and Shaving Horse – This tool bridges the gap between the axe and knife. It’s a handy tool to have but optional for beginners. It is best used with a shaving horse to perform powerful cuts with more control.
Power Carving Spoon Tools
Although traditional tools are still used for spoon carving, power tools can make some tasks easier and faster. Some popular power tools for spoon carving include drills, jigsaws, and other rotary tools, such as dremels. Jigsaws can be great for creating blanks. This minimizes wastage and speeds up the process. Rotary tools such as dremels can be used to hollow out the spoon’s bowl faster than a manual hook knife or carving adze.
Apart from making it faster to cut and grind through wood, power carving tools can also make it easier to cut through hardwoods. Hand carving a hardwood is harder and can take a toll on you if you’re a beginner. You can easily get through some processes with a power tool and carve out a spoon. Check out our best power tools for carving.
Choosing Which Wood to Use
Choosing the right wood for spoon carving is crucial for your project. In spoon carving, the go-to wood has always been greenwood. Greenwood is far easier to work with because of its high water content, which makes the fibers softer and more flexible.
As a spoon carver, you’ll engage with the wood from the very first stages of chopping it down. This way, you can make better choices on how to use different parts of the tree. Whether you’re using a whole round or branch wood, it is better to be efficient with the material you have at hand. Using a bent branch is one way of using the tree’s natural curve as the foundation of your spoon’s shape. Carving a spoon with wood that has deformations, knots, and lumps can also produce interesting patterns. The wood around these deformations is also more compact, making your spoons stronger and getting less differential shrinkage.
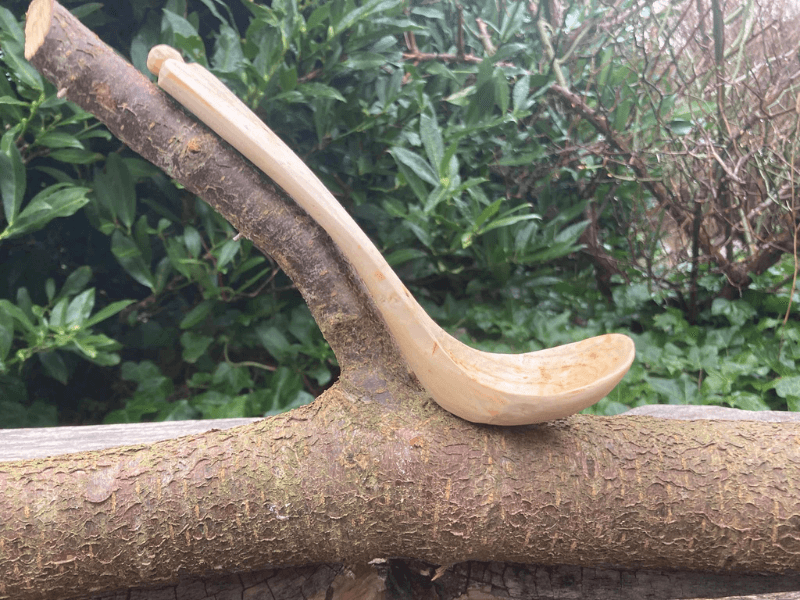
Blackthorn Spoon and Branch
Knowing the difference between softwoods and hardwoods is also crucial in allowing you to pick the right wood species. Softwoods are not suitable for spoon carving. This is because they have widely spaced grain, and the softness of the wood also makes them easier to tear. They are also quite porous, making them unsuitable for making spoons, bowls, or other utensils that may come in contact with liquids or food.
Hardwoods tend to be close-grained, less porous, and very strong. This makes them best for making objects like spoons that will be used daily. Although they are harder to carve when dry, working on them when green makes them softer and easier to carve. Some of the most popular woods used in spoon carving include alder, applewood, maple, birch, cherry, and sycamore.
Creating a Spoon Carving Blank
Armed with your tools and the right type of wood, it is time to start carving a spoon.
The first step in spoon carving is creating a spoon carving blank from a billet. A spoon carving blank is a rough shape that resembles a spoon. First, trace out the shape of the wood using a template or another spoon on the wood. Once you’ve traced your spoon’s design, start cutting away carefully so you can end up with a more spoon-like shape.

The Process of Carving a Spoon
An axe is the best choice for roughing out the billet into a spoon carving blank. It allows you to remove large chunks of wood easily and faster quickly. When creating a blank, always leave a wide square shape, as this gives you the option to design the spoon. Removing too much wood from the edges can affect the shape of the bowl later on as you carve.
Once you’ve created your basic spoon blank, it is time to begin creating a finished spoon.
Carving The Finished Spoon
Carving the finished spoon will require a straight knife and a hook knife. First, you can start by refining the spoon with a straight knife and hollowing out the bowl with a hook knife. This will require a variety of knife grips, e.g push cut or pull stroke; make sure you’re careful to avoid any accidental slips that could cause an accident.
Once you’re hollowing out the spoon and creating a symmetrical neck, you can refine the handle. If everything goes well and the general shape of the spoon emerges, you can start using detailed cuts to refine the spoon. Make sure to carve the spoon nicely and smoothly to avoid gaining furs as soon as it gets wet.

Refining The Spoon’s Handle
If you’re happy with your refined carved spoon, you can start to sand it. One thing to remember when sanding is to sand with the grain and not against it. This will ensure you achieve a nice smooth finished spoon. Work your way down starting with a 120-grit sandpaper up until you’re happy with the overall surface finish.
Applying Finishes to a Carved Spoon
Once satisfied with the overall look of the spoon, it’s time to apply a food-safe protective finish. However, it is only sometimes necessary to finish spoons. If you do decide to finish your carved spoon, classic natural oils like walnut, linseed, and tung oil are good to use. Apply the oil to the spoon generously and let it sit for some time because it will take time to soak.

Oiling Carved Spoons and Letting Them Sit for Several Hours
Warming the oil before applying it to your spoon will make it penetrate deeper. Once the spoon has soaked in the oil for about an hour, wipe off the excess oil and leave it for a week or so to dry properly. After some time, you can choose to refinish your spoon for maximum durability.
