Chip carving as we know it today originated from Europe. In Germany and Switzerland, chip carving is known as Kerbschnitzen, which means ‘engraving carving’. The essence of chip carving is its simplicity and versatility.
It is a decorative style of carving that can easily be learned and used to decorate every wood tool, piece of furniture, and utensils around your home.
What is Chip Carving?
Chip carving is a decorative style of wood carving that involves incising a pattern or design directly into the wood. The name chip carving comes from the technique employed. This is removing a series of precise and regular chips of wood to form an engraved design that is lower than the surface of the wood.
In other words, the wood chips are removed to leave the desired design behind. This is as opposed to whittling, relief, and in-the-round wood carving, which remove wood shavings to extract the design from the wood.
Chip Carving Techniques
Geometric Chip Carving
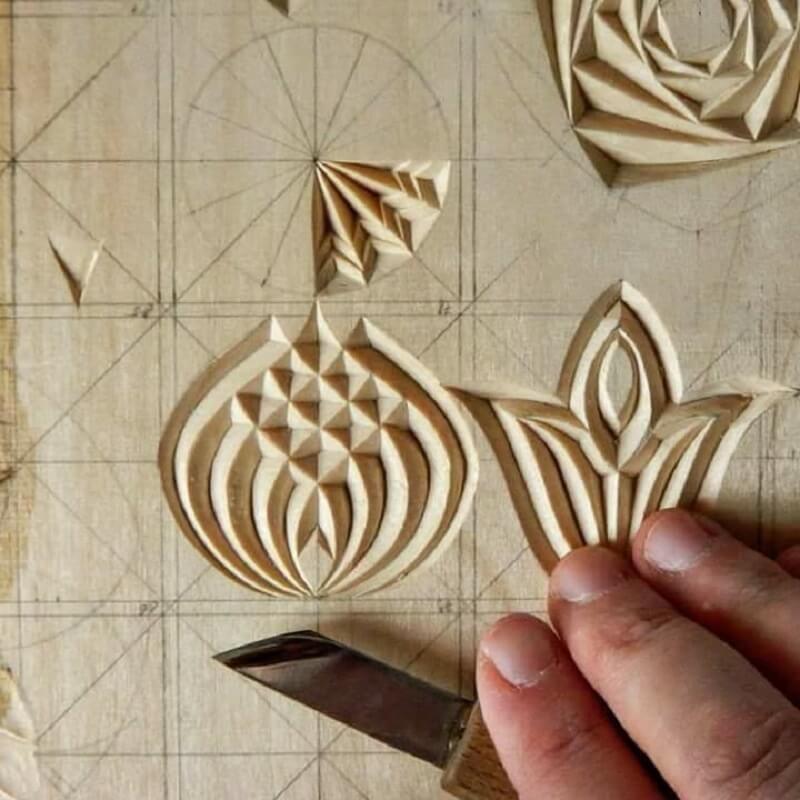
The standard chip carving or geometric chip carving that uses geometric designs is the most universally and widely used chip carving technique. Geometric chip carving is often presented within or as a rosette.
Geometric chip carving is executed using stab cuts directly into the wood to a uniform depth and angle of entry. A few other cuts used include the plunge cut and slicing cuts. The plunge cut goes straight into the wood and is backed out slowly. Slicing cuts include both push cuts and pull cuts. These cuts are frequently used to remove a chip from wood and pop it out neatly.
Free-Form Chip Carving
This chip carving technique is an extension of a chip carver’s artistic talents after mastering geometric chip carving. Free-form chip carving works best using long, curved lines common in floral motifs. However, figures can also be done using free-form where the layout lines do not have to be carved precisely.
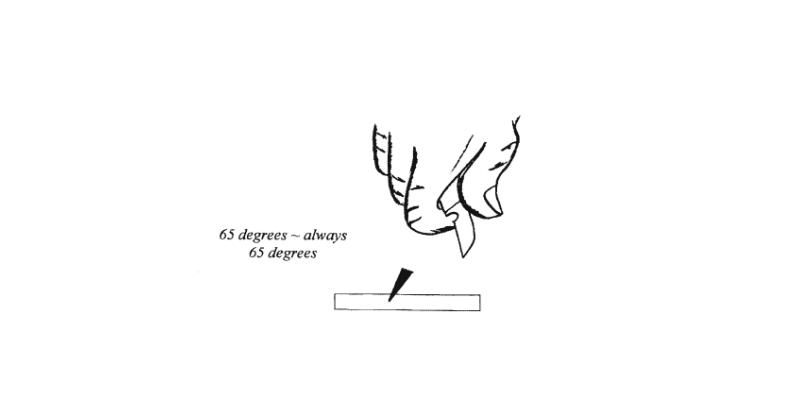
In free-form chip carving, the cut changes with depth, while the angle of the blade entry changes from one end of the cut to the other.

The illustration above shows how the depth of the cut changes. The blade entry angle also varies from 45 to 65 degrees as the knife is drawn through the wood from one end to another.
Shallow Chip Carving
Shallow chip carving was developed as chip carvers used denser woods such as elm and pea. In shallow chip carving, the chips are barely a millimeter deep. Using dense wood that does not take a chip carving knife well, use shallow chip carving to decorate it. Shallow chip carving is also less time-consuming because shallow chips are widely spaced.
Old-World-Style Chip Carving
As the name suggests, old-world-style chip carving has been around for a while and can easily be traced back to the late 1800s. Old-world-style usually has longer and larger chips, meaning it takes up more space and less work is involved. This technique is usually faster than geometric chip carving because there are very small chips to be removed.
Woods for Chip Carving
Not all types of woods can be used effectively for chip carving; some are better than others. Like a painter expressing his art on a stretched canvas, wood is the canvas upon which a chip carver displays his work. The better the canvas (or wood) performs, the better the carving. Below are some good woods to use in chip carving.
Basswood
This is the king of all carving woods, whether chip carving, relief, or carving in the round. Basswood is classified as a hardwood, but it is very easy and satisfying to carve. Basswood or Linden is known by various names. In the United Kingdom, it is known as Limewood, while German-speaking countries call it Lindenholz, ‘Holz’ meaning wood.
Basswood has a pale cream to yellowish-brown color. It is very light in weight, and the grain is even and very close throughout the wood. This combination gives it strength, and because of its consistency, it is easier to carve. For beginners and professionals alike, basswood should be the first wood you choose for chip carving.
Other Woods to Use
Apart from Basswood, Both Butternut and Eastern white pine are great for chip carving. They are light in weight, moderately soft, and carve easily. If you’re looking for other alternatives, check out our detailed post on the best woods for chip carving.
Chip Carving Tools and Materials
Chip Carving Knives
The shape and design of chip carving knives differ from other wood carving knives. The blade on a chip carving knife protrudes from the handle and bends at a downward angle to allow for more control. The two knives you need for chip carving are a cutting knife to cut chips on the wood and a stab or skew knife for making an impression as desired in work.
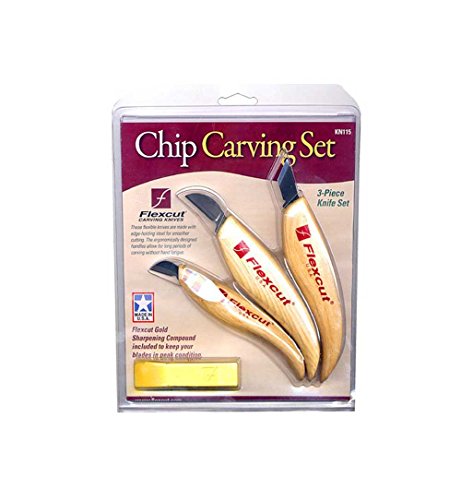
If you’re a beginner starting (or even an expert), check out the FLEXCUT KN115 Chip Carving Set. It has three different types of knives to get you started with chip carving.
You'll get a mini-chip carving knife, a chip carving knife, and a skew knife. The knives feature high-quality carbon steel and come razor-sharp out of the box. They hold an edge, and the handles are comfortable for long chip carving sessions.
Other Materials Needed
Apart from knives, the remainder of the materials needed for chip carving include a pencil, eraser, T-square ruler, drafting or bow-type compass, and a sharpening tool. For the pencils, use either HB or B lead refills. Using a harder pencil than HD might cut into the wood instead of drawing on the surface of the wood. The T-square is good for doing your layouts. It should have a straight edge, and you can buy one with metric and imperial systems.
How to a Hold Chip Carving Knife
Many chip carvers say a carver is only as good as his tools. Although this is true, how he uses them also matters. Holding your chip carving knives correctly will make it easier, faster, and more pleasant to carve. Below I have illustrated two positions for holding the cutting knife and one for the stab knife.
Position 1
The first position helps you to learn to use the large cutting knife. First, pick the knife and hold it like a kitchen knife. Now, turn your hand over and notice the knife lying across your palm. This is the desired position, but instead of using all fingers, hold it with your last three fingers. Your index finger will now serve as a resting point instead of gripping the knife.
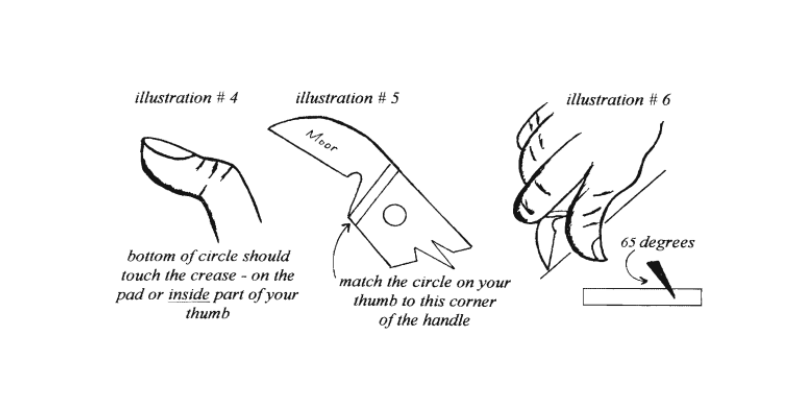
Now bend your thumb and notice the first joint and how the thumb forms a crease when it bends. Look at the knife handle and place the thumb joint on the handle’s edge. Some chip carving knives come with a thumb notch on the handle, making it easier to know where to place the thumb.
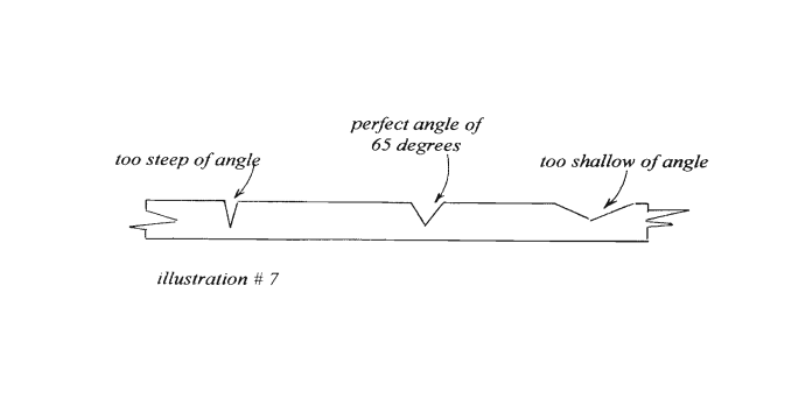
The angle created should be around 65 degrees to the surface. A lesser angle will be shallow, and the shadows they reflect will not be sharp and defined. Chip carving and more than 65 degrees will make your chips too deep, and the steepness along any ridges might result in many breakouts. Below is a video by my chip carving that shows you how to do it.
Position 2
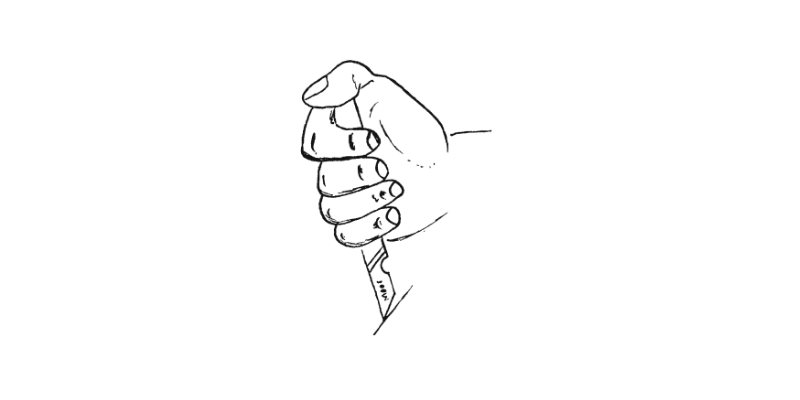
Hold your hand on the wood like in position 1, and then lift it to loosen the grip on the knife. Now turn the knife in your hand, so the blade faces the opposite direction. Place the thumb directly on the back of the edge of the knife’s handle.
Holding your knife in this position will always assure your cuts are at 65 degrees in either position one or two.
Position 3
The last position is holding a stab or skew knife. This does not remove the wood but is pressed or shoved into the wood. The shape of the blade of a skew chip carving knife allows it to cut wood fibers and separate them leaving a wedge-shaped impression. A stub knife is held just as you would when stabbing something.
You’ll have more control when you place your thumb over the tip of the handle. The further you push and rock a stabbing knife into the wood, the larger the impression you will leave. A stab knife does its duties quickly and efficiently to enhance any of your carving designs.
Laying Out & Transfering Patterns
Laying out all the basic lines of a design before you start carving ensures the finished work is visually balanced and proportionally correct. When starting, begin by quartering the shape or piece to be carved. This will allow you to locate the center and provide a basis for other divisions.
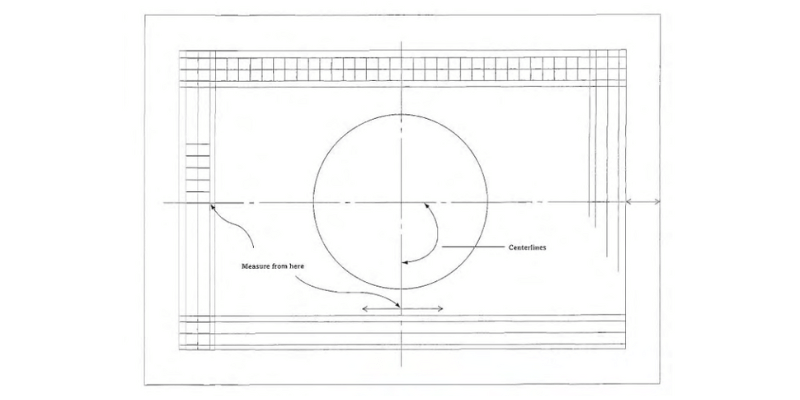
If the design is all geometric, most of it can be drawn onto the wood using a ruler and compass. Like in the illustration above, layout the border lines in millimeters, quarter the carving and measure the pattern from the center lines for equal spacing.
Use graphite paper under tracing paper to transfer the pattern or trace it onto the wood. Tracing a pattern onto wood is especially useful for free-form designs. Seeing through the paper allows you to position the pattern perfectly onto the wood.
Happy Chip Carving
Chip carving is simple to learn but challenging to master. The tools used are simple and can create versatile designs and beauty. I hope this guide makes you try out chip carving, which is one of the easiest forms of wood carving. Happy chip carving.
