There are several types of wood carving, and each employs a uniques method that requires specific tools. The common types of wood carving techniques include whittling, chip carving, relief carving, and carving on the round.
Relief carving is one of the oldest forms of wood carving and uses a veriety of tools. Are you a beginner looking to start relief carving? In this post, I share everything from types of relief carving, common tools used, and some beginner tips to help you start on the right foot.
What is Relief Carving?
Relief carving is the process of cutting a pattern or design into a flat surface. Common relief carving media include wood, stone, clay, linoleum, and synthetic carving blanks. In a finished relief carving, the design protrudes from the wood, which gives the piece a sense of depth. The lower the background, the higher the design appears to be.
Types of Relief Carving
Sgraffito
Sgraffito is the simplest form of relief carving> Sgraffito means to scratch into the surface using the most basic relief carving tools like bench knives and V-gouges. In Sgraffito, the design is made with thin shallow cuts across a flat surface.
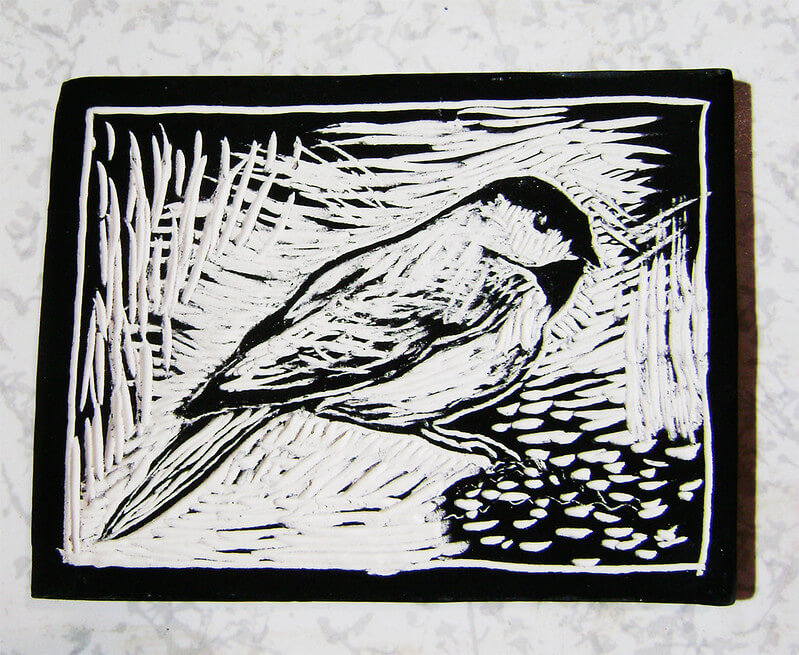
Sgraffito Technique on Ceramic
Sgraffito types of relief carving are mostly used in clay. This is because the rough and hard surface of the wood will not create a smooth finish as you scratch it off.
Low Relief/ Bas-Relief
Low relief carving is also known as bas relief (Italian basso rilievo, a.k.a. low-relief). In this type of relief carving, the image is slightly raised from the surface. A good example of low relief carving is a coin.
Starting with low relief is great for beginners because it requires less work and modeling. Relief carvings are also cheaper and faster to produce because only a small portion of the background needs to be removed.
High Relief
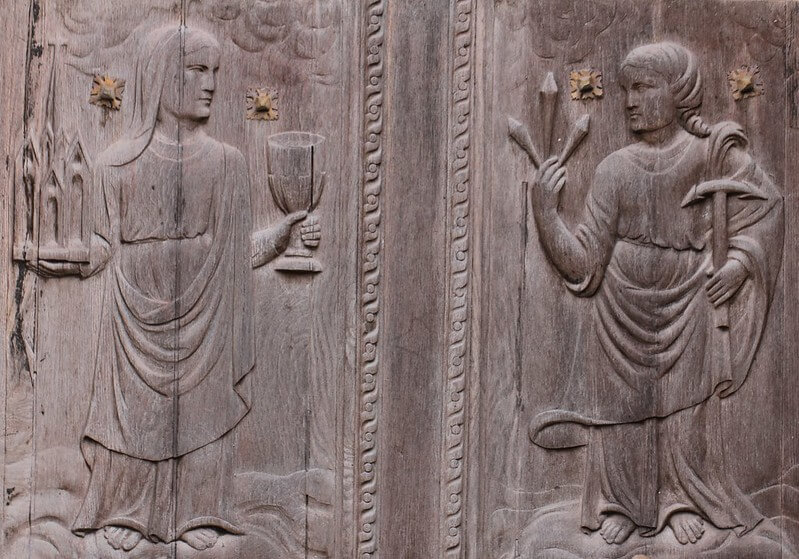
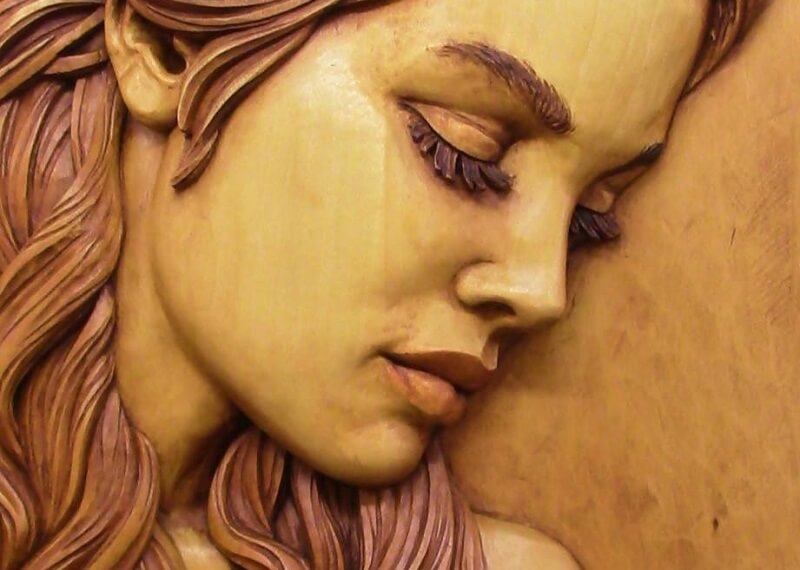
In high-relief carvings, the image is noticeably raised from the background surface. High relief carvings contain a lot more detail and are harder to reproduce for beginners.
Apart from cutting deeper into a surface, high relief carvings can also be achieved using a technique called undercutting. This technique places the joint lines between two elements underneath the higher element using concave or convex curves. This adds realism to a finished carving.

Some areas in high-relief carvings can also be cut to become freestanding within the overall design. For example, a blade of grass or branches in a tree can be undercut to separate a portion of the grass blade or tree branch from the elements below it. Undercutting in high-relief carvings adds large and darker shadows to a finished piece.
Apart from these basic types of relief carving, there are also deep relief carving, pierced relief, sunk relief, and counter relief.
Tools Used in Relief Wood Carving
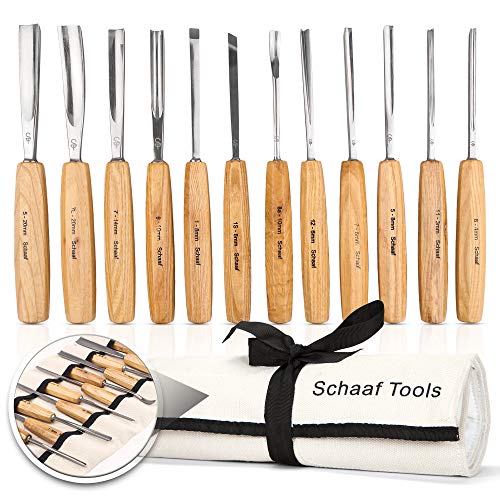
Different wood carving techniques require different specialty tool requirements. For a beginner starting, it is difficult to know which tools you will be using. In this case, I recommend getting yourself a basic tool kit that features different tools. As you grow in the craft, you can add to the tools you find more useful.
For a beginner, I strongly recommend the Schaaf Wood Carving Tools 12-pc Chisel Set with Canvas Case.
Though cheaper than our top pick, this Schaaf Chisel set is great for those looking to get started on a budget. It comes with 12 pieces that are well-made, razor-sharp, and hold an edge. It's hard to beat this chisel set at the price.
Best Wood for Relief Carving
When it comes to relief carving, the different types of wood suitable for wood carving can be used. Each wood has its carving properties, but, it is best to choose a wood you can easily work with for a beginner. This will allow you to learn how to use your tools, and control your cuts before going for other wood species.
Basswood
It is also called Lime or Linden in Europe. Basswood is classified as a hardwood, but it has one of the softest carving surfaces. It has a creamy white appearance with a fine, straight, and even grain. Basswood is easy to carve for beginners and even works excellent for detailed works.
Relief Carving on Basswood
Butternut
Butternut (Juglans cinerea) is also known as white walnut or oil nut. For relief wood carvers, Butternut is a favorite because it takes the fine details and finishes with a very beautiful luster. However, when using butternut for carving be careful when taking deep cuts along the straight grain. This can cause the wood to tear out or pop.
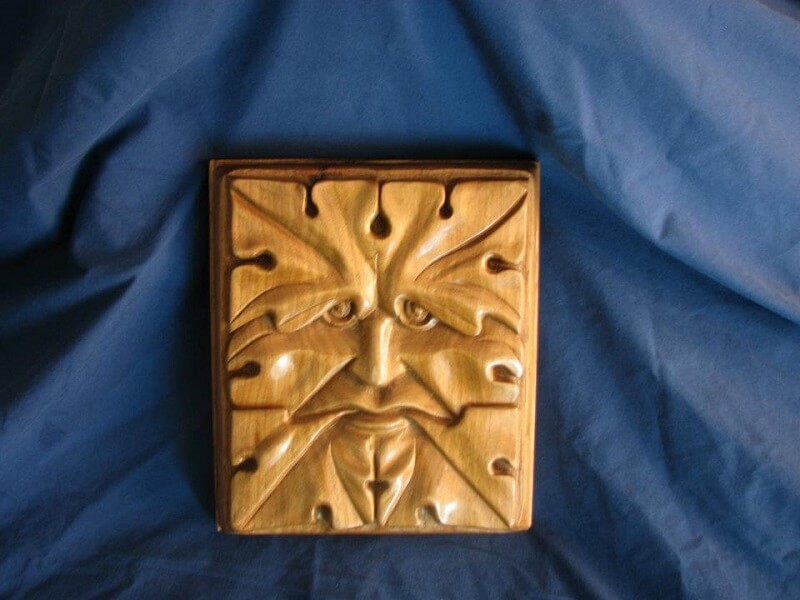
Relief carving of the Green Man out of Butternut wood
These two kinds of wood are the best to use for beginners looking to start relief wood carving. However, you can also check out Red Cedar, Yellow Cedar, Cherry, Jelutong, Mahogany, Soft Maple, Obeche, Sassafras, and Walnut.
Although most wood carving woods are safe, some are toxic and might cause respiratory and skin irritation problems. Research the type of wood you are using to ensure they are safe.
Remember, quality wood creates quality carvings. So when selecting your wood or carving blanks, look for clean, blemish-free wood with no signs of warping or cupping.
Relief Wood Carving Patterns
Carving patterns in relief wood carving carry the general outline of the area to be carved but also show the details and accent lines. Tracing a complete pattern onto the wood will erase the marks as you carve. To prevent this, below is how you can simplify your relief wood carving pattern. This is borrowed from the Relief Carving Workshop book by Lora S. Irish.
1. The first step of simplifying a relief carving pattern is assessing it and recognizing the general outline and fine finishing details.
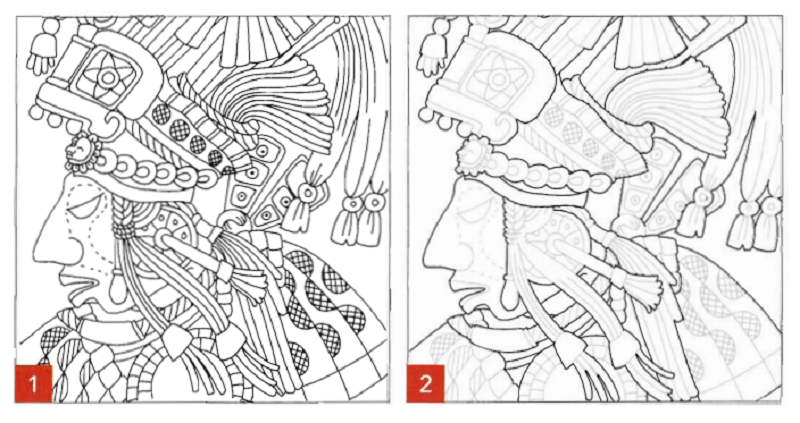
2. The second step is to outline the outer edges of the main elements in the pattern that will be in the first steps when carving. For example, in the image above (2), the front parts of the headdress are grouped and defined as one element.
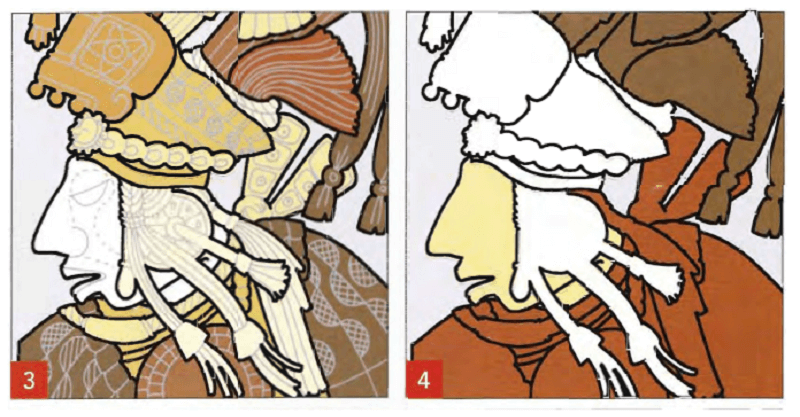
3. After the second step, color each major element and create a pattern of individual elements instead of the fine lines.
4. Once done, you can further recolor and group the elements to simplify the design more. For example, in the picture below, the hair and hair ornament (shown in dark brown) are grouped into one larger element.
5. After that, number the group of elements on the pattern according to their depth within the final design. In the pattern below, the highest areas are marked with one, high and mid-ground as two, low mid-ground as three, and the background elements as four.
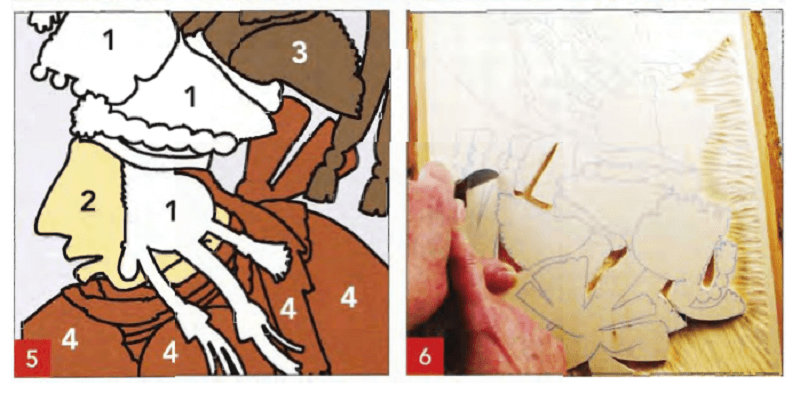
6. Once done numbering the patterns, you are ready to trace the outline of each ground to your carving blank. When you start carving in the first steps, each group can be carved to the required depth and then shaped.
Transferring a Pattern to a Carving Blank
You can trace or transfer your pattern to a carving blank in several ways.
First, you can use graphite paper, which is lightweight and has a waxed graphite coating on one side. The graphite side is placed on the wood when tracing out the pattern. This will result in tracing with medium-gray colored lines. Graphite paper is available in different sizes and can be reused several times.
Second, you can use carbon paper. This has long been used to make copies of typed or written documents. It comes in either dark blue or black color. The trace makes heavy, dark, and bold lines when carbon paper is used. Carbon paper is great for long-term projects because the traced lines hardly fade or rub off after time.
The third method of transferring a pattern is using pencil rubbing. Use a soft number 2 to number six pencil over the back of the pattern. The darker you color the back of the pattern, the darker the trace on the wood will be. Once you are done coloring the back of the pattern, trace it to your wood blank. This method is great because you can erase the back pencil shading and use the pattern for some pyrography work.
Start Relief Carving
To get better at relief carving
- Create a practice board and try out the different cuts, strokes, and techniques in relief woodcarving.
- Explore the different tools and learn which will create the best cuts.
- Once you’re good, start working on your main project.
It takes time to get better, as with any craft. Happy relief carving.
