I’ve been a wood carver for most of my life. I started out with a simple pocketknife to having a carving studio full of different tools. Over the years, I’ve gravitated toward one carving technique, learned and developed it well, then moved on to another. From chip carving, relief carving, bird carving, doing caricatures, signs, and much more.
I’ve always had an interest in and love for everything wood carving. Anything that came my way, I would try it out. In this post, I’ll share what I’ve learned through the years to help beginners and pros alike develop and learn to carve efficiently. Enjoy
Learn Different Wood Carving Techniques
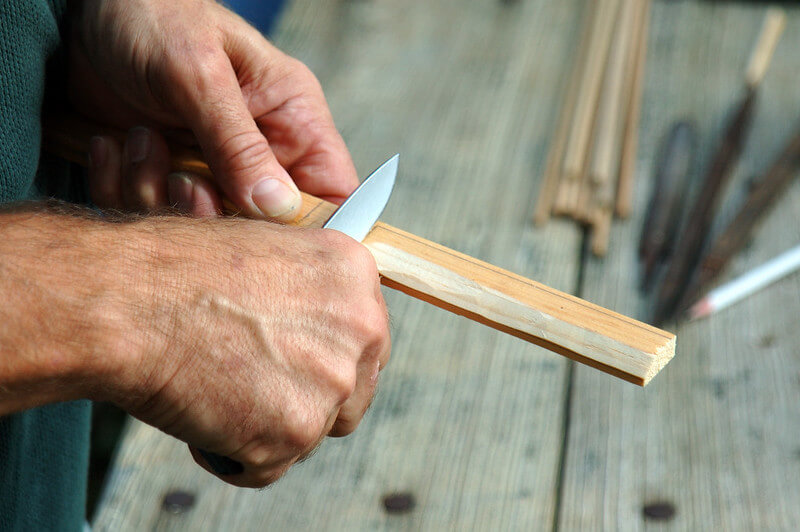
Wood carving is the art/craft of creating an object, shape, or design on wood. The methods and techniques of wood carving vary greatly from simple forms such as whittling to advance wood carvings like bird carving. Whittling is the best starting point for a beginner that will teach you the basics, such as different cuts, knife grips, and much more.
Whittling is the Simplest Form of Wood Carving
Apart from whittling, there are chip carving, relief carving, carving on the round, spoon carving, and other techniques. The type of wood carving technique you pursue will also influence the different tools you have. After learning the basics of wood carving, you can learn the different techniques to determine which one interests you.
Understand Different Woodcarving Tools
Over the course of my wood carving years, I have collected a large collection of tools, like most carvers. However, a beginner can use something other than an entourage of tools and equipment for carving. You’ll only require a handful of tools for most of the work. The fewer tools you have at your disposal, the fewer you have to sharpen and debate which one to use for any given situation.
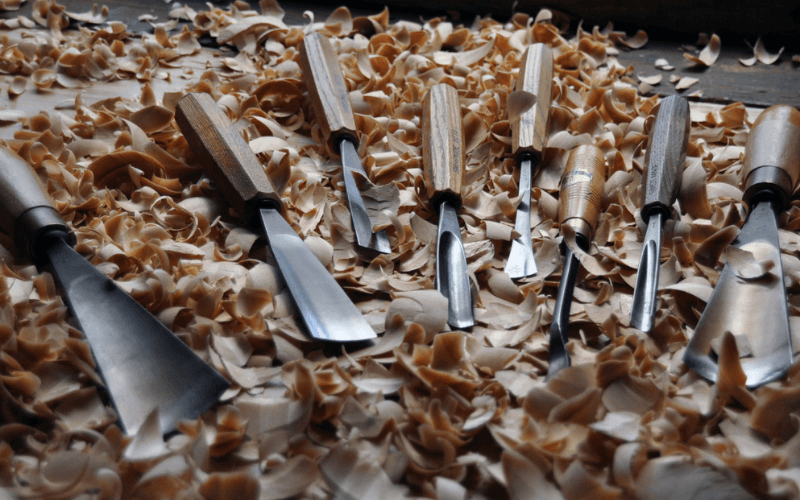
Although tools are the lifeblood of any trade, the question is, what do you need to get started? There are a variety of tools and materials. Pocket knives, specialty knives, chisels (See our best chisel sets), gouges, V-tools, and many other accessories. No magic tool can help you get started or create miraculous work. When shopping for tools, consider the carving project, the task at hand, and the quality of the tool.
For example, a chip carver’s basic hand tool is the universal straight chip knife. With this tool, a chip carver can handle most projects without additional tools. For a relief carver, the tools will vary according to the design, but a beginner’s tool kit will have a chisel, bent gouges, straight gouges, and a V-parting tool. For whittling, a basic tool you might only need is a pocketknife or specialty knife. Check out our best pocket knives for whittling.
> Recommended Reading: Types of Wood Carving Knives
Learn To Sharpen Your Tools
Properly sharpening your tools is one of the most important aspects of wood carving. Dull carving tools hinder even the most enthusiastic carver and make this hobby/pastime a very frustrating experience. In this case, having razor-sharp tools is essential for wood carving. Sharpening will take a little practice to get right but don’t get frustrated, and it also took me a while to acquire the skill too.
The first step to sharpening your tools is grinding. Grinding the tool on a grinding wheel or stone helps you obtain the shape you wish to have for the end. After grinding, you’ll move on to honing, using a Belgian or Arkansas stone. When honing your tools, progress from a coarse stone to a medium stone to a fine stone.
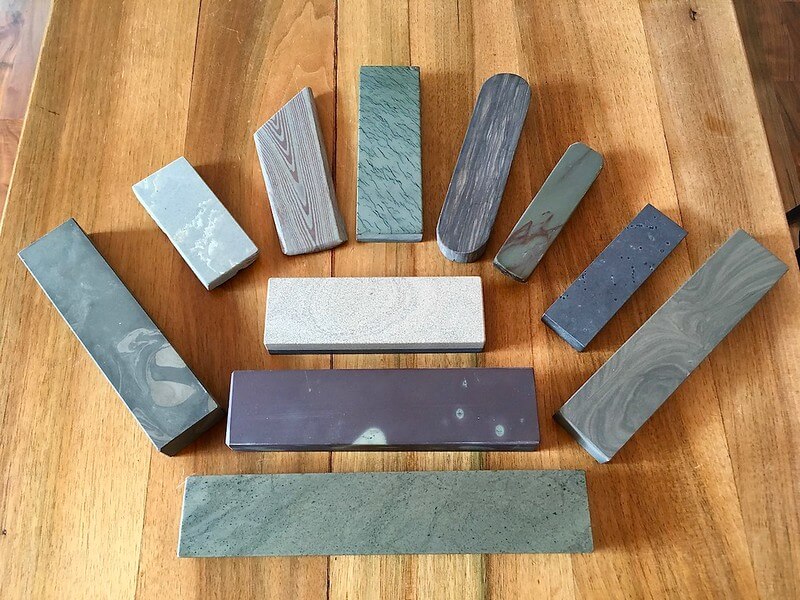
Sharpening Stones
Once you’re done honing, then it’s time for stropping. Stropping is done to remove small particles of steel on the tool’s edge and leave behind a perfect mirror finish. A leather strop with a buffing compound is used for stropping your tools.
Once you’re done sharpening, it’s time to use your tools. However, you should also recognize when they need to be re-sharpened. Your tools will become dull with use, and you’ll need to periodically touch them up as you work.
Choose The Right Wood
There are a large number of wood species available. However, of all these, only a few are prime candidates for carving. You can obtain good quality wood from several sources, like specialty lumberyards, sawmills, and even mail-order suppliers. Local carving clubs and carving shows also have information on where to source wood for carving.
For beginners, basswood is the most popular and widely recommended. Basswood has ha a pale white color and uniform grain and is very easy to carve. It also holds details very well and has a lot of strength. White pine is also another easy-to-carve wood with pronounced grain than basswood. White pine is, however, best to carve when wet because it splinters when dry. Apart from these two, there is also butternut, tupelo, cherry, black walnut, and much more.
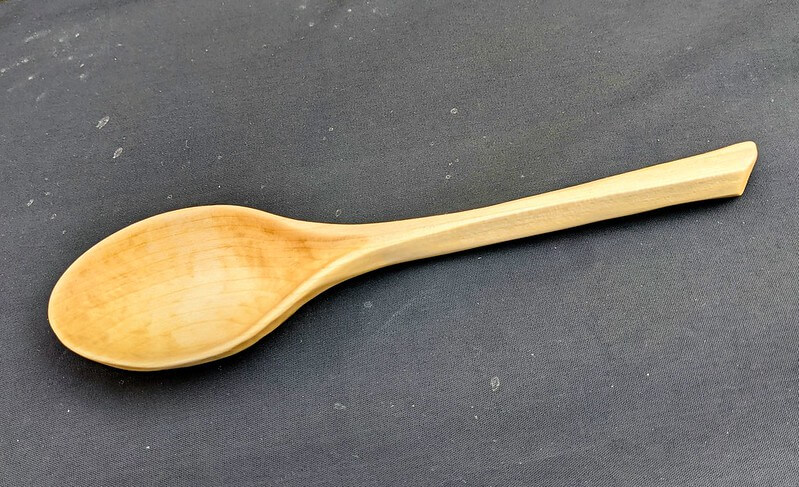
A Spoon Carved Out of Basswood
Softwoods are the best choice for beginners to practice and grow their skills. However, as your experience grows, hardwoods become suitable choices to use. The nature of the project will also determine the choice of wood.
> Recommended Reading: Easiest Woods to Carve as A Beginner
Safety Should Come First
Safety should be the first consideration before you start wood carving. Being informed earlier and taking the right precautions will keep you safe and also enhance your overall carving experience.
As a beginner, wearing safety gloves and other hand protection is necessary when using knives. An accidental slip of the knife can cause a slicing cut that could end up being fatal. Cut-resistant gloves and thumb protection/guard will help if the knife slips to handle the impact. If you’re a beginner, check out our best wood carving gloves and grab yourself a pair.
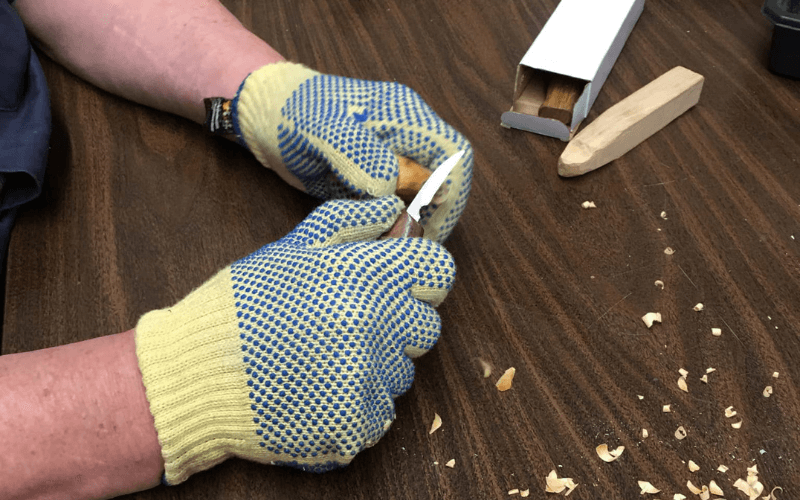
Kevlar Cut-Resistant Wood Carving Gloves
If you’re power carving, the biggest risk is the dust generated through grinding, sanding, and cutting wood. These small particles can cause respiratory problems like asthma and other allergic reactions when inhaled. Getting a dust mask or setting up a dusk vacuum will help minimize the amount of dust you inhale.
Apart from getting yourself protective equipment and accessories, you should also work on the lighting of your workplace, keep your tools sharp, and learn how to hold your wood carving tools correctly.
Start Simple and Improve Your Skills by Learning
You might be tempted to start carving intricate projects when you start wood carving. Without enough practice and wood carving skills, harder and more detailed projects will leave you frustrated. As a beginner, start by whittling or completing simple wood carving projects. Whittling a stick can help you practice and master different cuts and learn about grain direction and different knife grips.
As you advance and perfect your skills, you can move on to slightly intricate projects. Learning and practicing are essential to master wood carving. Many wood carving books, youtube channels, Facebook groups, and other online resources can help you develop your skills.
Learn to Finish Your Wood Carvings
After you’ve spent a lot of time on your project, it is time to finish it. There are better ways to go than compressing the finishing session into a rushed 10 minutes session. Give yourself time, relax, and enjoy the process of getting your wood carving spring to life.
Sealing or oiling them is usually enough for wood carvings, like spoons and other kitchen utensils. However, for other wood carvings, you’ll need to consider the color scheme and how the different colors will complement the carving. After painting, seal the surface of your wood carvings to help bring out the color and avoid showing the end grain.
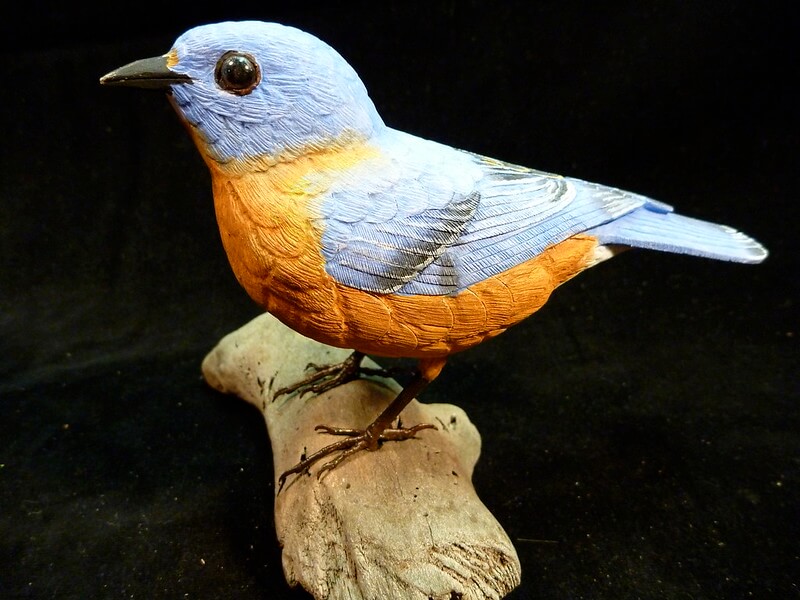
Realistic Bird Carving Photo by Jonathan Ellinger
Apart from painting, learning a simple craft like wood burning can also help enhance your carvings. Wood burning or pyrography is done using a heated pen to decorate a piece of wood. The use of wood burning in carving can help create texture, enhance a wood carving, or add features.
> Recommended Reading: How to Finish Wood Carvings
